Showing posts with label garden. Show all posts

Tuesday, June 4, 2013

Anatomy of a Tootsie Bucket

Every year I set up a Tootsie Bucket with a cherry or pear tomato, and every year afterward I do a facepalm and remember that I was going to actually document it this time.
Hey, I finally remembered!
For the back story, see that first link where I explain how the bucket got its name.  It's a self-watering container that my dad made me a kit for years ago, and I've been using it ever since.
And now I'm going to show you how to make one, too.

This is last year's bucket, with a Riesentraube cherry tomato planted in it.  I set it handy to the deck, so I could grab a tomato or two on the way by.


So, let's roll up our sleeves and get started!

First you'll need a bucket.  Mine is a five gallon pickle bucket, which you can sometimes get from your favorite restaurant for the asking.  (If they garnish their plates with a pickle, they'll probably have a bunch of leftover buckets kicking around.)  If all else fails, you can buy a bucket at the hardware store.  Four gallon bucket, five gallon bucket, doesn't really matter.  My dad has even used plastic storage tubs that he got a good deal on.
Drill a hole in the side about 5 inches up from the bottom.


Next you'll need some lengths of pvc pipe.  (If you're lucky, you've got some scraps just laying around.  Or one of your friends does.  Ask around.)  The longer piece is for the fill pipe and is the 1" diameter size - you'll need a piece that's a couple of inches longer than the bucket is tall.  The shorter wider piece is 3" diameter and about 6" long.  Dad cut a series of slits in one side of this (probably using the same chop saw that he used to cut the pipe itself.)  Since you've still got the drill handy from drilling the hole in the bucket, you could just drill a bunch of holes in the pipe instead.
(And I'll point out here that I've been using these parts for many years now, so they're stained and grungy looking.)


Next you'll need some rocks.  I use some that I originally picked out of our driveway.   Every year I rinse them off and re-use them.  You'll need enough to fill the bucket to a depth of 4-5 inches.  Small rocks, pea gravel, whatever.


 And since you've got rocks, you'll need paper and scissors as well, of course.  (Sorry, no lizard or Spock.)


Cut the bottom off a brown paper bag, then cut out a circle as big around as your bucket.  Don't sweat this too much - it doesn't have to be exact.  I usually just cut a square roughly the right size, fold it into quarters, then into eighths, and cut off the pointy corners.  Unfold and you've got a circle.  Ish.


 Now fold it up again because you forgot you actually needed a donut.  Cut a hole in the center roughly 3" in diameter.  Ish.


Now, some assembly required.  Set the 3" pipe roughly centered in the bottom of the bucket.  Stand the fill pipe up next to the edge.  (Note:  I discovered that it's a good idea to put the fill pipe somewhere near the hole in the side of the bucket.  I'll explain why later.)
Carefully dump in your rocks around the pipes, leaving the 3" pipe empty.
(And I got to this point with this the other day, then had to bail because a sudden thunderstorm blew in.  I ran into the house just in time for the power to go out.  High winds, rain, crash boom zap.  You know.  Spring.  So the rest of the photos were taken today, as I finally got back to the project.  There's about an inch of water in the bottom of the bucket in the following photo, leftover from the storm.  I decided there was no point in dumping it out, since I'd just be filling the bottom of the bucket with water later anyway.)


Now, take that circle (ish) that you cut out earlier and push it down into the bucket, fitting the center hole around the 3" pipe and tucking the edge around the fill pipe.  (You could cut out an area for the fill pipe, but it's really not worth the trouble.)


At this point, you can dump some time-release fertilizer on top of the paper circle.  I thought I had some, but couldn't find it, so I skipped that step.  It's optional anyway.  It just means that I'll water with a fertilizer solution now and then over the summer, instead.)

Now, mix up a big bowl of dirt.  I used a combination of garden soil and compost, about half and half.  Use what you've got - garden soil with potting mix, compost, whatever.
And this next part is very important.  If you're small like me, set the bucket where you're going to want it to be for the rest of the summer.  It's about to get very heavy, and unless you've got someone strong to move it for you, you're going to be stuck with it In. That. Spot.


Fill up your bucket.  Don't pack it down - just fluff it in.  Stop about an inch or so from the top.


Now we put the cover on.  I use a circle (ish) of black plastic that is on its 4th year or so.  It's enough bigger than the top of the bucket that it hangs down 4 or 5 inches all around.  There's an X cut for the fill pipe to fit through, and an X in the center for the plant to fit through.  Tie it down with a couple of turns of string.  I used jute twine, but anything will work.  Twine, string, rubber bands.  Whatever you've got.  Duct tape would probably work, too.


The view from the top.


Now slap a tomato plant in there and you're good to go.


Now, grab the garden hose, fill with water through the fill pipe until you see water starting to drip out the hole in the side of the bucket.  And that's why I advised you to put the fill pipe near the hole - so you could see what was going on.  (I didn't do that the first year - I had to keep peeking around to the back of the bucket to see if it was full yet.)


Tada!


This year, I've got a Sweet 100 cherry tomato that I bought at Agway, since we didn't get any heirloom cherry tomatoes started.
But I'm still going to call it a Tootsie Bucket, since Sweet 100 Bucket just doesn't have the same ring to it...

Sunday, May 12, 2013

You knew there'd be more lamb pictures, right?

Here's our newest little one:


 She looks a little better all dried off.

One of Onyx's babies came up to investigate the strange lady squatting amongst the sheep.


And I managed to sneak up behind this little girl and scritch her under the ear.  She enjoyed the scritching right up until the moment that she realized she didn't know what was going on and looked over her shoulder.  Then she bolted to a couple of feet away and gave me such a Look..
.

We had a great time at NH S&W, looking at all the wonderful fiber.  I kept visualizing the multiple bags of fleece waiting for me at home in order to restrain myself from buying more fiber.

But this was the big find:

I have big plans...


Thursday, March 15, 2012

No Lambies Yet, and Other Mid-March Updates

(And how did it get to be the middle of March, anyway?  Did we skip a week or so somewhere?  Why wasn't I told?)
 I've been spinning a bit here and there.  My long-draw is slowly improving as I get more practice, but I still haven't put in enough time with it for it to seem easy.  Not proficient, by any means.  (Is there such a thing as antificient?  Still antificient...)

 And still unable to get a good pic of that fiber.

 Still knitting.  I only seem to get a row or two done a night, but patience is rewarded.  (Eventually...)  I'm this close to finishing the toe of sock #2:


And it's time to think gardening.  The damn snow will be gone soon - Spring is going to come.  (I keep telling myself that to keep my spirits up...)                                                                                                              


Tomato seedling are happy little things.  Notice the white marker in the lower left corner - I cut up the lid from a sour cream container to make plant markers.  Usually we use the cut-up container itself to make markers from, but this year I had more lids than containers, so I'm testing the lids.  (Write on them with pencil, rather than pen or marker.  Ink fades in the sun, pencil does not.  Just a little tip from your Auntie Mango.)

Last chance for entries in the great LambWatch of 2012.  I really am going to close entries this time!

Saturday, September 17, 2011

So let's get this show back on the road...

I've come to the conclusion that I'm always going to be busy and tired, so I might as well try to squeeze in a post.
We had a light frost last night - not the Jack Frost's Revenge kind of killer frost, but a good strong nip. Luckily, the weather service had predicted it (and they were right for a change) so Madman had bustled out after work yesterday and hauled in everything he could grab out of the garden. We've spent the day (except for the morning, where I got called in to work to cover for a sick co-worker. Damn my Team Spirit - it causes more trouble) packing stuff into the freezer.
First the greens (chard and beet), and then the beans (green and yellow). Peppers are next, and then a big kettle of tomatoes is going on the stove for sauce as soon as we can free up a burner. The onions are spread out to finish drying down. Cucumbers are everywhere there's a spot open to set down a cucumber. (Look first before sitting down on the couch, just in case...)
The brussels sprouts are still out in the garden - a couple of frosts will actually benefit them rather than harm them. And the carrots (what few germinated) are safely underground, hiding from the cold.
Garden '11 is winding down. We're already planning Garden '12.

Wednesday, July 27, 2011

Just Dew It

When I went out to feed the animals this morning, I saw little white patches scattered here and there in the grass. A closer look revealed spiderwebs covered in dew.

It was early enough that the sun hadn't reached them yet - later on in the morning they were almost invisible.
I ran inside for the camera, of course.
I think there's a spider lurking in the little funnel-shaped hole. Using a blade of grass, I tickled the edge of the web, trying to draw her out. Either I can't imitate a trapped insect very well, or she's too smart to fall for such a shabby trick. I was disappointed that she didn't appear, since I really wanted to see the spinner.
Here's another web, with the toe of a size 8 Muck boot for scale. (It's actually Madman's boot - I wear them for chores. I walk like Sora of Kingdom Hearts in them, but love them just the same.)

And as long as I had the camera...

This is a Riesentraube tomato plant that I raised from seed and transplanted in a Tootsie bucket.
Check out how many flowers there are on one stem:

(The white is more dew. Maybe I should take a picture during a drier part of the day?)

And for the flower lovers, here are some of the false sunflowers that are spreading all over my flowerbed.

I really need to go out and clear some of them out, since they're too tall for the front of the bed and are masking and shading out some of the shorter plantings. But it just goes against the grain to murder flowers...

Monday, July 18, 2011

Four, Five, Six... What's up with this?

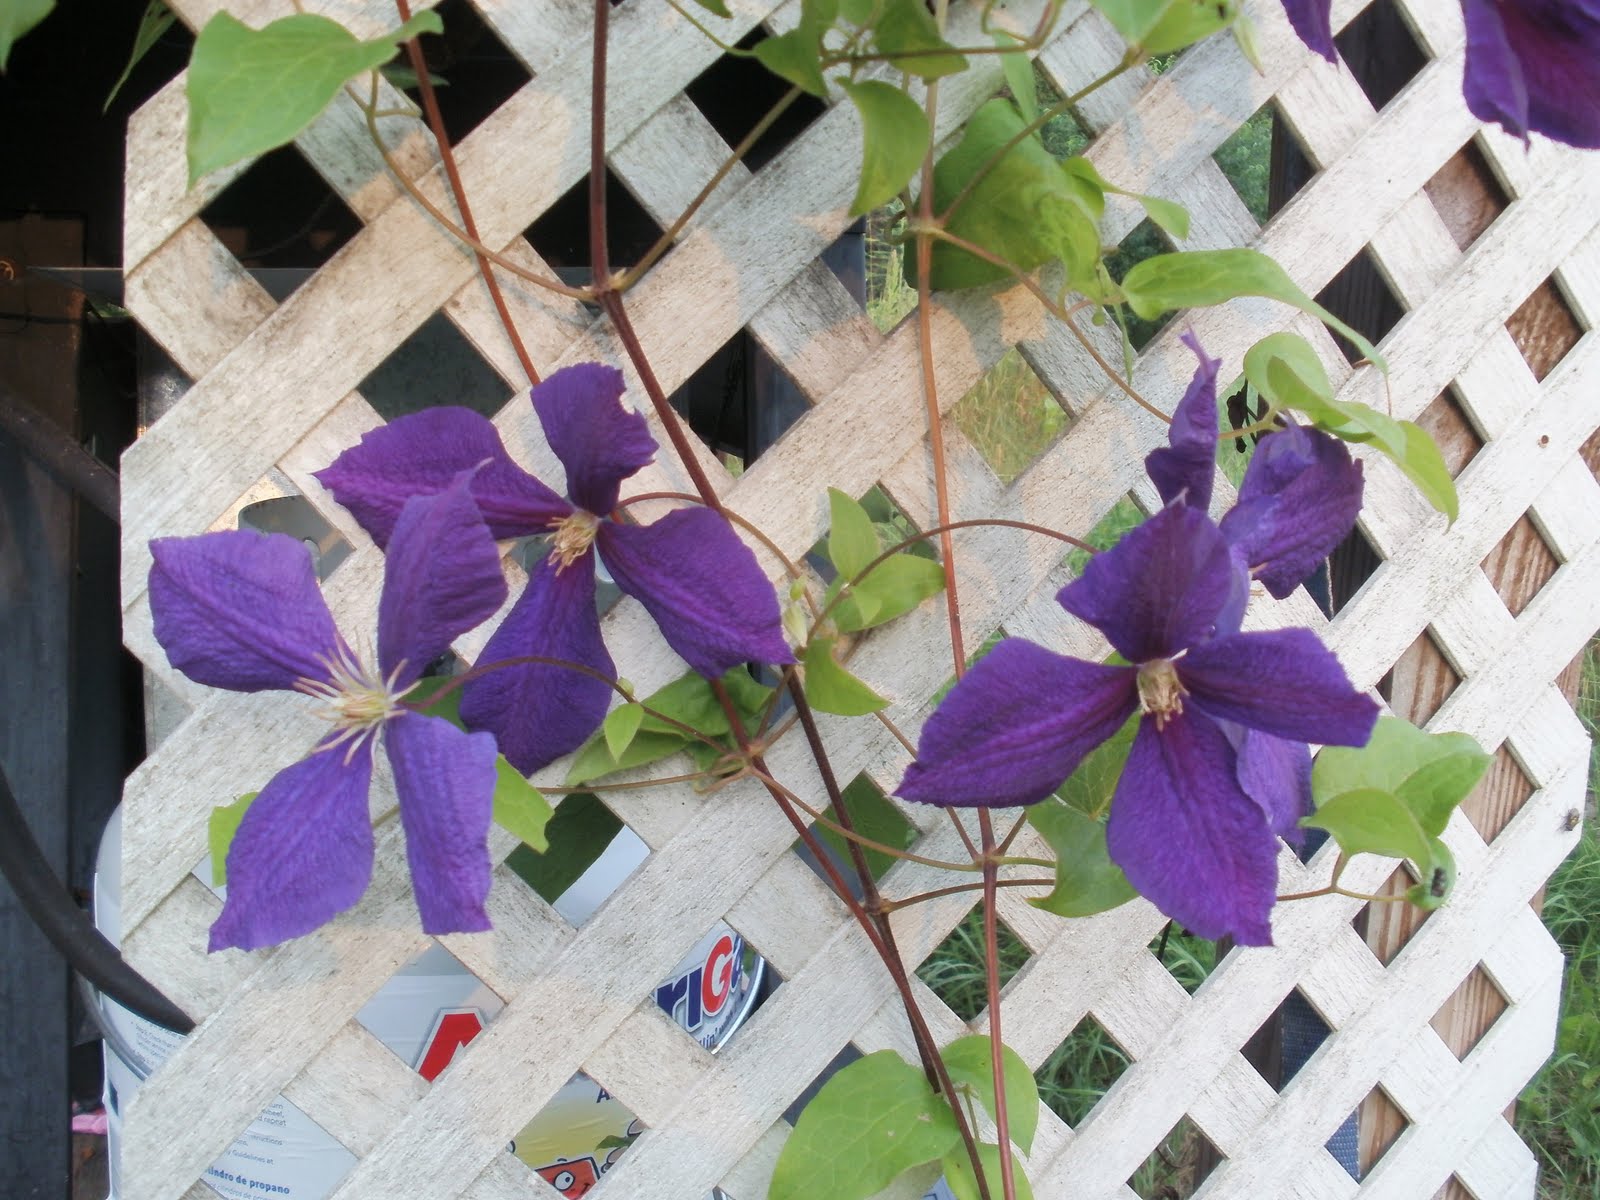
This is my clematis.

It's been growing happily at the corner of our deck for a number of years, its beautiful 4-petaled flowers brightening my day whenever I look at it.

But.

This year is different.

Four petals:


And five petals:


And six petals:


Wait, what?
How can the same clematis vine have totally different flowers on it?
Any botanists out there?

Saturday, May 7, 2011

In the beginning, there was dirt

Which over the last couple of weeks, (when it hasn't been raining. Which days are few and far between.) we've been getting ready to plant.
Today was the day. I finished weeding the asparagus bed, and rummaged around in my main herb bed enough to plant some more bunching onions. (I keep a running bed of them at one end of the herb garden, but the last couple of years they haven't overwintered well, so I cast out a bunch of new seed to start over.)
Madman planted lettuce, spinach, beets, radishes, and the first row of peas.
Let Garden 2011 begin!

Sunday, May 1, 2011

Spring Sprang Sprung

Hey, it's finally spring up here! For certain definitions of spring. That doesn't mean we won't get another snow or two before summer arrives (or even after summer arrives), but for up here, this is as good as it gets.

The tulips are up! No buds yet, but soon...

The first daffodil up is almost ready to bloom. There are a few more daffs lagging behind, but I'm surprised any of them came back after a guest weedwhacked them last year, thinking they were some kind of heavy-duty grass. So I'll take what I can get and be happy.

I hadn't checked the rhubarb yet this spring - it's going all kinds of crazy. Rhubarb pie, rhubarb dumplings, ginger rhubarb jam... Lovely stuff, rhubarb.

Today's big project was putting up the greenhouse that we acquired from friends who are moving away. One of Madman's buddies showed up to help, which was a wonderful thing.

The sheep's pen is next to the garden, and Goldie spent the whole afternoon trying to cajole the guys into giving them more food. Because why on earth would humans be outside if they weren't actively feeding sheep?


They got the walls up and a couple of the roof trusses attached before they had to call it quits for the day.


Once the structure is complete and the plastic is on, we'll be able to set out our tomato and pepper starts and gain about a month on the growing season.

The chickens have been taking advantage of the warmer weather by spending lots of time outdoors. But there's a serious hitch in their enjoyment.

Over the last couple of years, several new springs have bubbled up in our yard. Each year, more and more water is gushing up out of the ground and heading down the hill. This year, half the chicken yard is now a bubbling stream. Once the greenhouse project is done, Madman will go to work trying to channel the water into the trench he's been carving to handle all the water runoff. We really didn't need a babbling brook running from the upper end of our garden, through the chicken yards, and down our driveway...

Here's one of our spring-molting chickens. I think she looks like a Skeksis...

One of the day's smaller projects was removing the Rhode Island Red chicks from the Big Box o' Chix and putting them into their own little habitat. The CornishX chicks have entered the stage where they spend all their time eating, and they were starting to elbow out the smaller Red chicks.
Here you can see the size difference. The Red chick is actually a day or two older than his mutant brethren, but is half the size.

Madman had actually started the transfer before I realized what he was doing (I was still absorbing coffee, so not too quick on the uptake.) I ran for the camera since I wanted to get that size comparison picture.
The Red chicks were a little spooked, as they were getting scooped up one or two at a time and whisked away to the other box.
Here's one trying to hide in the crowd.

("Shhhh... He'll never see me in here...")

Here they are, happy in their new home.


No more having to fight through a crowd of big hungry buffoons just to get a bite of lunch.

Saturday, October 9, 2010

Hip Deep in Green Tomatoes

Why does it seem like I work harder on my days off than I do at work? (And I work really really hard at work...)

I had to make a quick trip across the border to NH this morning. Shopping opportunities are limited up in our corner of the state, but goodies abound on the other side of the river. I'd no sooner crossed state lines when I saw blue lights flashing ahead - a cruiser and a big silver minivan were pulled over at the side of the road. I changed lanes to give them plenty of room, thinking the trooper had caught himself a speeder, when I saw a very large deer - a doe - lying dead at the edge of the road. The minivan had a serious punched-in look on its front bumper.
It's bow season for deer in Vermont - apparently NH has a minivan season.

(And remember this from last year? Yeah. Hunting season + Madman = that smell in the dryer area...)

We're madly putting the garden to bed (when Madman isn't sneaking through the woods with his bow) since they're predicting hard frosts for the next several nights. We've had a few light frosts that finished off the fragiles like beans and squash vines. Today he grabbed all the tomatoes and peppers out of the hoophouse, since it's going to be too cold for even that to offer protection. At the moment, every flat surface in the house is covered in tomatoes in all stages of ripeness.
Anyone got any good recipes for green tomatoes?

Sunday, August 29, 2010

Whole lotta not-picking goin' on

I'd wanted to try out my new yarn picker today. I've got wool all washed and ready to go. I had the day off.
But.
The day just got jam-packed.
We butchered a couple of chickens this morning, Madman and I. The original plan was to do the remaining 10, but none of our helpers (i.e. amateur chicken-pluckers) could come and help today. So we tackled what we could handle, given how many other projects we had for the day.
Then we put 24 pounds of elderberries in the freezer. (Woohoo! Free fruit!) I would have taken pictures, but it's the same process as last year. Forks, fruit, bowls. Berries ricocheting all over the kitchen. After the first couple of hours, the fun starts to wear off...
We didn't start any wine, yet, but we will. In the meantime, the freezer is holding the elderberries for us, and, as a by-product, doing the mashing for us as well. (The formation of ice crystals within the berries smashes the heck out of them. Does a much better job than we could ever do with a potato masher.)
I butched the basil, since now that it's almost September, we could get a frost at any time. (Gotta love Zone 3. *sigh*) I made 3 batches of pesto, 2 of which went into the freezer. I filled icecube trays with the glorious green stuff - I'll bag up the individual cubes once they're frozen solid. Perfect little portions to add to pasta or soup, come winter. (So our ice cubes will taste a little funny for awhile. Big deal.)
And somewhere in between all this, I managed to bake a loaf of bread.
Madman picked beans while I was picking basil. We ate some for supper, but the rest went into the fridge, since we'd completely run out of steam by then. Tomorrow is another day.
And the rest of supper? The Second Annual first pestodilla of the season - homegrown tomatoes and homemade pesto. Life is good...

Sunday, August 8, 2010

It's my birthday, so I made myself a present. (How to make a lavender wand)

And I remembered to take pictures, so you can make one, too!

I read about Lavender Wands years ago - a nifty little sachet made of woven ribbon and stems of lavender - and wanted to try it myself.
There were a few bumps in the road, however...

Year one with the lavender - the plant was too young and didn't put off enough blooms.
Year two with the lavender - I picked the lavender, carefully dried it, then read the instructions. I was supposed to make the wand while the stems were still green and pliable. And unfortunately, I'd picked all the lavender. It's tucked away in my sewing room somewhere. I think.
Year three with the lavender - I forgot to watch for blooms. By the time I remembered to pay attention, it was too late. Blooming over.
Year four with the lavender - a tough winter killed off about half the plant. Not enough blooms.
Year five with the lavender - rain and more rain and even more rain. Not enough blooms.
Year six with the lavender - there'd been some recovery from winterkill, but summer was a repeat of the previous year. Still not enough blooms.
Year seven - hey! That's this year! And look! Lavender!

All you need is stems of lavender and ribbon. I used an inexpensive polyester ribbon, because that's what I had on hand. Silk ribbon would probably be extremely nice for this. Be sure to cut the lavender stems nice and long. (I used 17, because that was almost all I had. Be sure to use an odd number of stems!)

Step 1: Line up the bases of the flowers. Make a slipknot in the end of the ribbon and snug it up tight around the stems, just under the flowers. (Don't cut the ribbon from the spool. There's no way of estimating how much will be needed, and you don't want to run short in the middle of weaving.)


Step 2: Spread the stems out like the spokes of a wheel. The flowers will be pointed down, and the stems will be bent outward. Use your thumb to try to hold them into place.


Step3: Start weaving. For the first row or two, go over and under a couple of stalks at a time, since it's pretty tight going. (Note - you can weave clockwise or counterclockwise - whichever feels more comfortable. Doesn't make the least bit of difference in the final product.)

Step 4: Keep weaving. From here on, go over one, under one, around and around.

Here's what it looks like from the bottom.

Step 5: Start tapering. By pushing down gently on the stems, and pulling the ribbon a little tighter, the weaving will start to enclose the flowers. Keep going.

Basically, you're weaving a cage around the flowers.

Now here's where the camera bit me on the ass. Though it assured me it was diligently recording the pictures of the next steps, it lied.
So, step 6: (not pictured) When the weaving reaches the point shown in the last picture, start gradually pulling the ribbon a bit tighter as you go around. Not drastically, or the ribbon in previous rows will go all wonky and loose - you just want it to start gently tapering.
Step 7: (also not pictured) The last row or two, after you're past the last of the flower tips, will be woven over 2-3 stems at a time and under 2-3 stems. Wind the ribbon around the last row of weaving and then down the stems for an inch or so. Tie it off with a bow, cut the ribbon, and trim the ends of the stems even. Take a sniff or two (it smells divine!) and hang it somewhere airy to dry.


Ta-da!

And only 7 years in the making! Maybe patience really does pay off...